Jewelry Photography: How to Take Photos That Sell
FashionPix · Published 29 augustus 2026 · Last updated 4 augustus 2026
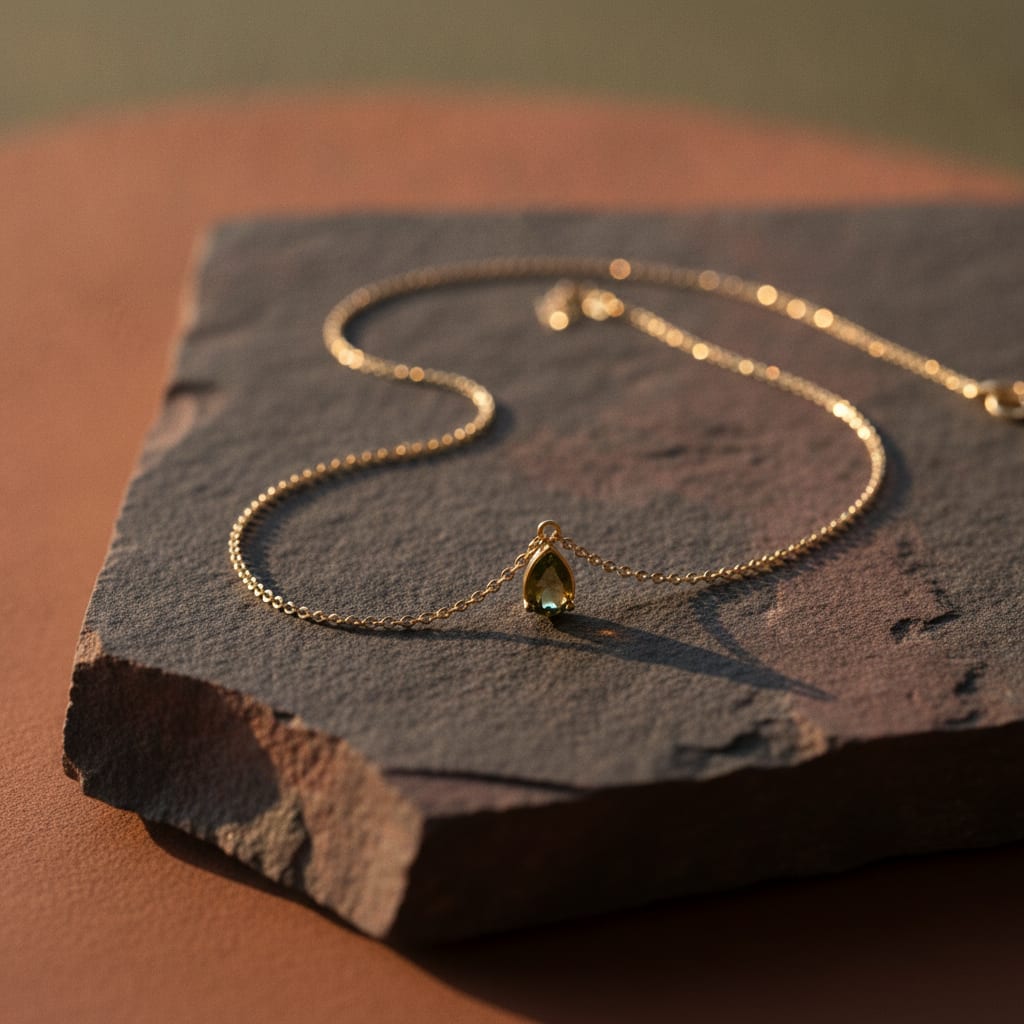
Photographing a three-gram necklace is trickier than photographing a jacket. Small, shiny, often translucent materials call for a different approach than the rest of your collection. In this article, you'll learn how to tackle jewelry photography so every piece looks sharp, valuable, and sellable.
Jewelry Photography: How to Take Photos That Sell
- Jewelry photography comes down to three things: sharpness, light without harsh reflections, and accurate scale.
- Use a macro lens or your phone's macro mode to capture details like facets and clasps.
- Diffuse light — from a lightbox or a cloudy day near a window — prevents distracting glare on metal and stone.
- Show jewelry both on its own and worn, so customers can judge details and size at the same time.
- With AI photography, you put a piece of jewelry on a real model without having to plan a photoshoot yourself.
Why is jewelry photography so tricky?
Jewelry photography is tricky because you're working with extremely small objects that often shine, reflect, or appear translucent. A regular photo flattens a ring and blurs a necklace into an unclear shape. You need sharpness down to the smallest detail, plus light that doesn't cause distracting reflections on metal or gemstones. On top of that, scale is hard to convey: without a reference point, a two-centimeter earring can easily look the same size as one that's a centimeter bigger or smaller.
With clothing, you can hide flaws with a good pose or a well-fitted fabric. With jewelry, every imperfection shows immediately, since the object is the entire focus and there's nowhere to hide it. A slightly blurry photo of a necklace looks cheap, even if the piece itself is expensive.
That's why many webshops shoot with a macro lens, a sturdy tripod, and soft, diffused light. It takes time: per piece of jewelry, you often need ten to twenty shots before one comes out fully sharp and reflection-free.
A second challenge is presentation. A ring on a white background tells you nothing about how it looks on an actual finger. Customers want to see how a piece drapes, how the light catches it when it moves, and how big it really is next to a hand or neck.
What equipment do you need for sharp jewelry photos?
For sharp jewelry photos, you mainly need three things: a macro lens or macro function, a tripod, and diffuse light. With just this setup, you can already capture ninety percent of what a customer wants to see: texture, shine, and shape. An expensive camera isn't required — many modern phones have a solid macro mode built in.
- Macro lens or macro mode: for millimeter-level sharpness, essential for rings and earrings.
- Tripod: prevents motion blur during the long shutter speeds macro shots require.
- Lightbox or softbox: spreads light evenly and prevents harsh reflections on metal.
- Reflector cards (white cardboard works too): fill in shadows without adding a harsh light source.
- Tweezers or tape: for precisely placing small pieces without leaving fingerprints.
- Neutral background: white, grey, or black velvet lets the jewelry speak for itself.
How do you avoid distracting reflections on metal and stone?
You avoid reflections by steering clear of harsh, direct light and working with diffused light from multiple directions. A lightbox with milky white plastic or fabric breaks up the light before it hits the jewelry. That gives you shine instead of harsh glare spots, while keeping the shape of the piece clearly visible.
Preferably shoot near a window on a cloudy day. That light is naturally diffuse and gives a natural shine without harsh shadows. Avoid direct sunlight or a bright lamp without a diffuser: that always creates a white hotspot exactly where you don't want it.
Work out your composition around the light too. Turn the piece a few degrees and take a new shot each time — with gemstones, the angle of light changes the effect enormously. That way you build up a set to pick the best shot from.
Reflective backgrounds, like glossy acrylic, look appealing but often work against you. They add a second reflection that distracts from the jewelry itself. A matte background in a neutral color is almost always the safer choice.
How do you show the right size and scale of a piece of jewelry?
The best way to show scale is by photographing the piece both on its own and worn, combined with concrete size details in the text. A photo on a white background shows detail but says nothing about size. A photo on a hand, wrist, or neck immediately gives a sense of proportion.
Customers buying jewelry online can't hold or try on the piece. That makes size uncertainty one of the biggest reasons for returns or abandoned orders. A necklace that turns out shorter than expected often comes back.
Alongside the photo, list exact measurements: length in centimeters, a ring's diameter, or weight in grams. Combine that with a photo showing the piece worn by a model with a recognizable build. That way the customer can judge for themselves how it would look on them.
For rings, a size chart with finger sizes works well, paired with a photo of the ring on a hand. For bracelets and necklaces, a photo showing the piece around a wrist or neck helps, alongside the standalone product shot.
- Always shoot at least one close-up detail photo and one worn photo.
- List length, diameter, or weight right next to the photo, not further down the page.
- Use a model with an average build as a reference point.
- Add a size chart next to the photo for rings.
- For necklaces, show how the piece falls against the neckline or neck.
How do you photograph jewelry worn without planning a photoshoot?
You can photograph jewelry worn without a photoshoot by using an AI tool that places the piece on a real model based on a single photo. No need to book a model, makeup artist, or studio. Upload a sharp photo of the jewelry and you'll get back images showing the piece worn by one of the available models.
At FashionPix, this works with 40 in-house models aged between 3 and 64. The real piece of jewelry gets transferred onto the model, not redrawn or invented — the shape, color, and details stay accurate. That's exactly what you need with jewelry, where small deviations stand out immediately.
This is especially handy if you have a small collection and no budget for a full-day photoshoot with a model and makeup artist. Instead, you upload one photo per piece and choose the model, pose, and background yourself. You don't send anything physical — everything happens with the photo you upload.
A complete listing, including images and product copy in four languages, costs 4 credits, roughly 1.30 euros. Want to see how it works first? Try six images for free, no account needed. That way you can test whether the results fit your collection before going further.
For extensive jewelry collections with many different pieces and variants, it's worth reading about jewelry product photography in general, or specifically about photographing jewelry if you're just getting started. That way you build a consistent product page step by step.
What else do you need to sort besides the photos themselves?
Besides sharp photos, you also need clear product copy, alt text for discoverability, and, where relevant, an AI label if you're working with AI-generated images. The latter has been mandatory since the EU AI Act and prevents confusion among customers. A good product page is more than a nice photo — it's the complete picture.
Alt text ensures your jewelry photos also get found through Google Images, which is a major sales channel for jewelry. Many customers search visually: they type 'gold ring with pearl' and scroll through images before clicking through to a webshop.
Size information should be standard with every jewelry photo, as mentioned earlier. Without it, you'll get more customer service questions and more returns from customers whose expectations didn't match reality.
If you want to streamline your entire photo process, it's worth looking into taking photos for your webshop more broadly. Jewelry is often just one category in a bigger range, and a consistent approach across all your product photos makes your webshop look more professional.
- Write a short, factual product description with material and dimensions.
- Add alt text with the type of jewelry and material, like 'silver necklace with pendant'.
- Clearly label AI-generated images as such, as required by the EU AI Act.
- Check that size information appears with every jewelry photo, not just in a table further down the page.
Frequently asked questions
Do I need an expensive camera for jewelry photography?
No, a modern smartphone with macro mode is usually enough. Steady light, a tripod, and sharp focus on the jewelry's detail matter more than the camera itself.
How do I keep fingerprints and dust off jewelry while shooting?
Use tweezers or gloves when placing the piece and polish it with a microfiber cloth right before shooting. Work in a dust-free space and check every photo on screen right away.
Should I always photograph jewelry on a white background?
White works well for clarity and suits most marketplaces, but a worn photo adds the context customers need to judge scale. Combine both for the best result.
Can AI photography show necklaces and bracelets being worn too?
Yes, you upload a photo of the jewelry piece and choose a model to place it on. This works just as well for rings, necklaces, bracelets, and earrings as it does for clothing.
Read more
- Clothing Webshop Photography
- Jewelry Photography
- Photographing jewelry
- Photographing clothing for webshop
- Packshot
- FashionPix — The signature of your webshop
Start small, see what works
You don't need to build a full studio setup right away. Photograph a few pieces with what you have now, pay attention to sharpness and light, and see how customers respond. Want quick worn shots without a photoshoot? Try six images for free at FashionPix first and see right away if it fits your collection.